
NOTICE
Brake fluid quickly ruins painted plastic surfaces; any spilled fluid should be completely washed away immediately.
If there is any damage, replace the damaged parts with new ones.
Torque - Brake Pipe Joint Nuts: 18 N·m (1.8 kgf·m, 13 ft·lb)

 KIBS Hydraulic Unit Removal
 KIBS Hydraulic Unit Inspection
Exhaust Butterfly Valve Actuator Installation
Install the pulley [A] on the actuator so that the hole side
[B] align with the groove [C] on the shaft.
Make sure that the groove on the shaft is pointing toward
the center of the screw [D].
If the shaft position is incorrect, refer to the following
NOTE and procedures to electrically ad ...
Rear Frame Front Removal
Remove:
Rear Frame Rear (see Rear Frame Rear Removal)
Rear Fender Front (see Rear Fender Front Removal)
Rear Footpeg Bracket Bolts [A]
Rear Footpeg Bracket [B]
Rear Frame Front Bolts [C]
Left Rear Frame Front [D]
Remove:
Rear Footpeg Bracket Bolts [A]
Rear Footpeg Bracke ...
Oxygen Sensor Heater Resistance Inspection
Turn the ignition switch to OFF.
Remove the fuel tank (see Fuel Tank Removal in the Fuel
System (DFI) chapter).
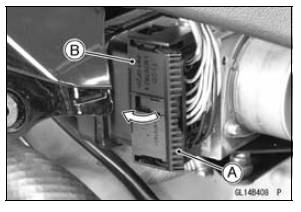
Disconnect the oxygen sensor lead connector [A].
Connect a digital meter [A] to the terminals in the oxygen
sensor lead connector [B].
Measure the oxygen sensor heat ...