
Connect the hand tester between the coil terminals.
Set the tester to the × 1 Ω range, and read the tester.
Connect the tester between the plug terminal and (–) coil terminal
Set the tester to the × 1 kΩ range and read the tester.
Stick Coil Winding Resistance
Primary Windings: 0.85  1.15 Ω
Secondary Windings: 5.0  6.8 kΩ
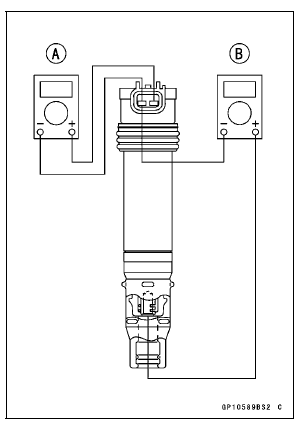
If the tester does not read as specified, replace the coil.
 Stick Coil Installation
 Stick Coil Primary Peak Voltage Inspection
Hoses and Pipes
Hose Installation
Install the hoses and pipes, being careful to follow bending
direction. Avoid sharp bending, kinking, flattening or
twisting.
Run the hoses (see Cable, Wire, and Hose Routing section
in the Appendix chapter).
Install the clamp [A] as near as possible to the hose end
...
Regulator/Rectifier Inspection
Remove:
Upper Fairing Assembly (see Upper Fairing Assembly
Removal in the Frame chapter)
Right Inner Fairing (see Inner Fairing Removal in the
Frame chapter)
Bolts [A]
Regulator/Rectifier [B]
Set the hand tester to the × 1 kΩ range and make the
measurements show ...
Compression Damping Force Adjuster and Rebound
Damping Force Adjuster Adjustment
The compression damping force adjuster
and the rebound damping force
adjuster are located on top of each front
fork leg.
Turn the adjuster clockwise with a
screwdriver to increase damping
force.
Turn the adjuster counterclockwise
to decrease damping force.
NOTICE
Do not force to t ...