

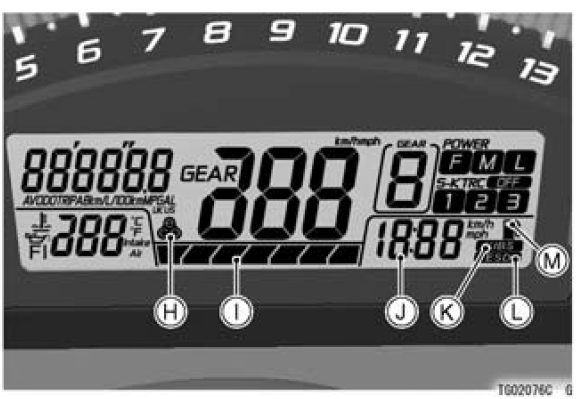
A. Multifunction Display
B. Speedometer
C. Gear Position Indicator
D. Power Mode Indicator
E. S-KTRC Mode Indicator
F. Warning Symbols
G. Lap Counter/Coolant / Intake Air Temperature Meter
H. Economical Riding Indicator
I. S-KTRC Level Indicator
J. Clock
K. KIBS Indicator (For the models equipped with KIBS)
L. Electronic Steering Damper Indicator
M. Fuel Level Warning Symbol (For the models equipped with KIBS)
Speedometer
The speedometer shows the speed of the vehicle in digital values.
 Instrument display brightness control
 Unit Setting
Crankshaft Sensor Inspection
Disconnect the crankshaft sensor lead connector (see
Crankshaft Sensor Removal).
Set the hand tester [A] to the × 10 Ω range and connect it
to the crankshaft sensor lead connector [B].
Special Tool - Hand Tester: 57001-1394
Crankshaft Sensor Resistance
Connections:
Meter (+ ...
Precautions
1) No need of topping-up
No topping-up is necessary in this battery until it ends its life under
normal use. Forcibly prying
off the seal cap to add water is very dangerous. Never do that.
2) Refreshing charge.
Give refresh charge for 5 to 10 hours with charge current shown in the text
(see ...
Front Fork Assembly
Replace the following parts with new ones.
Slide Bushing
Guide Bushing
Oil Seal
Install the following parts to the inner tube [A].
Dust Seal [B]
Retaining Ring [C]
Apply grease to the oil seal lips.
Install the oil seal [A] so that the stamp side faces lower
side.
Insta ...